Long Exposures - Creating Average Frames From Movies
HowTo linux media python · 3 comments · 750 words · read ~8,088 times.
I read a Guardian article about an artist who set up an analogue camera in front of their TV, set it to long exposure, and set a movie playing. The result was a rather wonderful collection of images.

You can see more of Jason Shulman's works
Is there a way to automate this process? Yes!
Here's my attempt at a "Long Exposure" of "Taxi Driver".
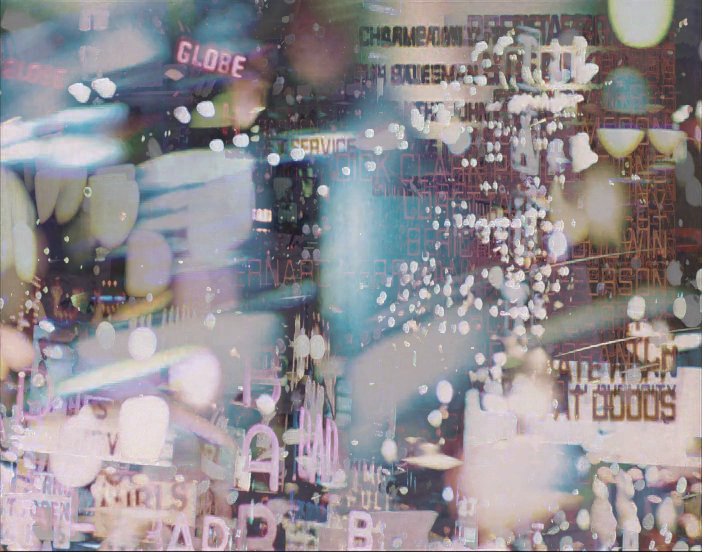
It's not the same as Shulmans's process, but I think it is rather charming. Here's a timelapse of how it was constructed.
I experimented with several different different methods (code at the bottom of the page) - here are some of my other experimental results.
Taxi Driver


The Muppet Movie

I also managed to create something similar to the originals.

That's a mid-point of the movie, heavily blended with previous frames.
Moana


HOWTO
There's a couple of different ways to do this. These example work on Linux. Doing a digital average of all frames produces a different effect to Shulman's analogue process - but they are just as pleasing to my eye.
Naive and Slow
First, let's extract all the frames from a movie:
avconv -i movie.mkv -r 25 -ss 00:00:06 -t 01:23:45 %06d.png
-r 25this extracts at 25 frames per second (for PAL movies). Useavconv -i movie.mkvto see which framerate you should use.-ss 00:00:06starts at 6 seconds in. This avoids the studio's logo.-t 01:23:45captures 1 hour, 23 minutes, 45 seconds. Useful to avoid the credits at the end.%06d.pngthe extracted images will be numbered sequentially starting at000000.png
To convert all those images to an average image, we use ImageMagick:
convert -limit memory 200MiB -limit map 400MiB *.png -average average.jpg
I've artificially limited the memory that the process can use. You can remove or adjust -limit memory 200MiB -limit map 400MiB depending on the speed of your system.
Fast and Pythony
We can use OpenCV to extract frames from the video. We can use PIL to average the difference between frames.
I tried several different options, but this produced the most pleasing results.
Python 3
from PIL import Image
from PIL import ImageChops
from PIL import ImageEnhance
import cv2
# Video to read
vidcap = cv2.VideoCapture('test.mkv')
# For saved images
filename = "test"
# Which frame to start from, how many frames to go through
start_frame = 600
frames = 180000
# Counters
count = 0
save_seq = 0
first = True
while True:
# Read a frame
success,image = vidcap.read()
if not success:
break
if count > start_frame+frames:
break
if count >= start_frame:
if first:
# Extract the frame and convert to image
average_image = cv2.cvtColor(image,cv2.COLOR_BGR2RGBA)
average_image = Image.fromarray(average_image)
old_image = average_image
first = False
if (count%100 == 0):
# Every 100 frames (4 seconds @ 25fps)
# Extract the frame and convert to image
image = cv2.cvtColor(image,cv2.COLOR_BGR2RGBA)
image = Image.fromarray(image)
# Calculate the difference between this frame and the last
diff = ImageChops.difference(image, old_image)
# Store the image for use in the next itteration
old_image = image
# Convert to greyscale and use that as the alpha channel
gray_image = diff.convert('L')
diff.putalpha(gray_image)
# Pick one!
#average_image = Image.blend(average_image,image,0.1)
#average_image = Image.alpha_composite(average_image,diff)
average_image = ImageChops.lighter(average_image,diff)
if (count%2500 == 0):
# Every 100 seconds (assuming 25fps)
print("saving "+str(count))
# Darken the image slightly to prevent it getting washed out
average_image = average_image.point(lambda p: p * 0.9)
# Show a preview of the image
average_image.show()
# Save Image
average_image.save(filename+str('{0:03d}'.format(save_seq))+".png")
save_seq += 1
if count == frames + start_frame:
break
count += 1
# Save the very last generated image
average_image.save(filename+str(start_frame)+"-"+str(count)+".png")
On my cheap and crappy laptop, a 90 minute movie took around 15 minutes to render.
To create a timelapse of the images, with two frames per second.
avconv -r 2 -i example%03d.png example.mp4
To crossfade the images in the timelapse
ffmpeg -framerate 2 -i example%03d.png -vf "framerate=fps=30:interp_start=64:interp_end=192:scene=100" example.mp4
Got a better / faster / more beautiful way to do it? Let me know in the comments!
mike says:
I am definitely going to try this.
You don't give a time for the Naive and Slow method. I assume it was slower than the Fast and Pythony method, but how much slower? ( I'm sort of hoping the Python method is a lot faster, to compensate for the time it took to write all that Python vs a couple of one liners 😉 )
Which method are the examples you show produced with?
Is there any noticeable difference between the result of each method?
I wonder, would the result if using only 1 image per second be perceptibly different to using 25 images for every second? Or using 2 images per second? Or N where N<25 and significantly reduces the time taken to render the image.
Terence Eden says:
Writing the movie to disk and then using ImageMagick was several times slower - it also took significant disk space and memory. Which my old laptop couldn't cope with.
I used several different methods - blends, composites, averaging - try them all and see what you like the look of best.
There wasn't any significant difference using every frame rather than every 25th - and it ran a lot quicker. Can't wait to see what you create with it 🙂
Thoc says:
Hey Terence !
Super cool stuff here 🙂
I'm currently trying and it look promising.
(btw an indentation problem on the line count += 1 at the end ?)